
· 12 min read
Bottle Cap Crafts for Adults: 10 Ideas (and How to Collect the Caps)
Bottle cap crafts for adults: 10 ideas from coasters and magnets to a resin bar top, plus how to collect, clean and finish caps safely and recycle the rest.
- bottle cap crafts for adults
- what to do with bottle caps
- DIY
- home bar
- crown cap
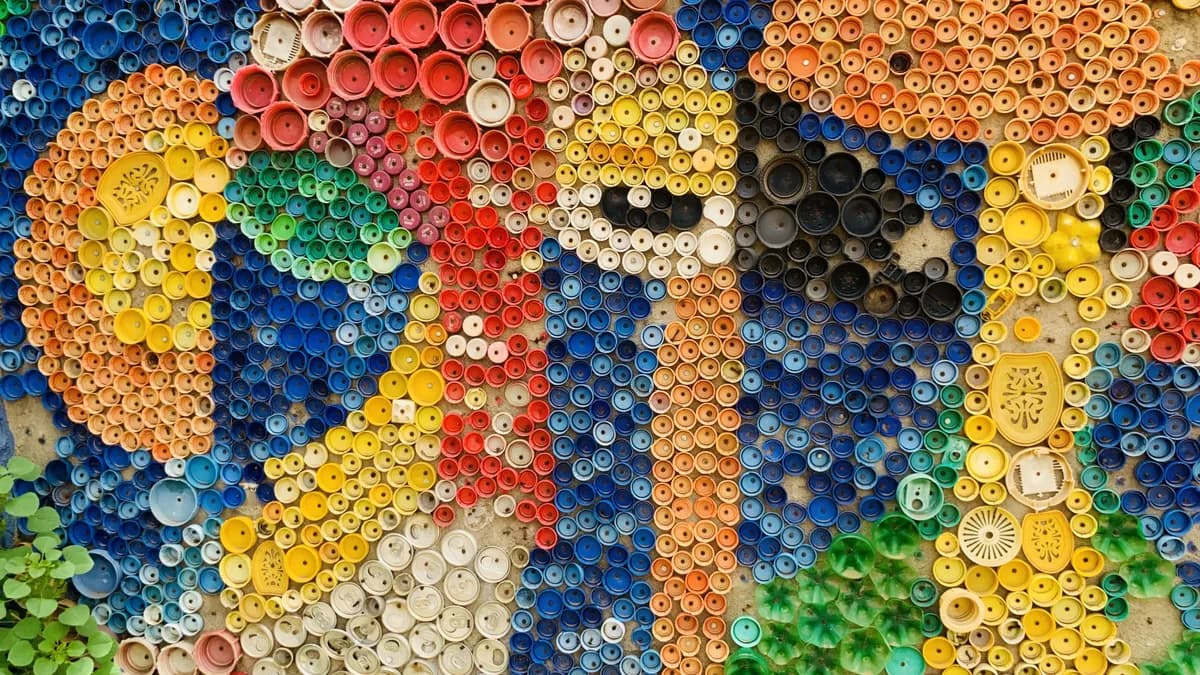
Bottle cap crafts for adults start with a jar of caps that's been sitting on a shelf for too long. A crown cap is a small steel or aluminum disc with a crimped edge and a plastic liner, which makes it sturdy, colorful and easy to glue, nail or set in resin. This guide covers what to do with bottle caps once you have enough of them: ten projects from a 10-minute fridge magnet to a resin bar top, how to collect caps without turning it into a drinking target, how to clean, flatten and finish them safely, and what to do with the ones you don't use. If you open your bottles with a Beer Mortar, you already know the first step: the caps have to be picked up anyway.
Key Takeaways
- Collect caps from what you already open, from friends and from parties, and count soda and alcohol-free caps too. A craft project is never a reason to drink more.
- Wash and dry the caps fully before you use them, and handle the crimped edge with care: it's sharp.
- Easy projects (magnets, push pins, ornaments) need a few caps and glue; bar tops and tables need hundreds of caps and epoxy resin.
- Epoxy resin calls for nitrile gloves and good ventilation, and strong magnets must stay away from children.
- Recycle the spares: many programs want them sealed in a steel can so they don't get lost in sorting.
Why bottle caps make good craft material
A crown cap was designed to be thrown away. William Painter's 1892 patent described caps "so inexpensive as to warrant throwing them away after a single use" (Wikipedia, Crown cork). The design has barely changed since: a metal shell with crimped flutes that lock under the bottle's lip, and a liner that seals the bottle. The cork liner began to give way to plastic in the 1950s (Wikipedia, Crown cork).
For crafts, that adds up to three useful traits. Metal caps are usually steel or aluminum (Wikipedia, Bottle cap), so they hold their shape, take paint and stick to most glues. Modern crown caps have 21 teeth around the edge, against 24 on Painter's first version (Wikipedia, Bottle cap), and that skirt gives each one a uniform circle shape that lines up neatly in a grid. And the printed tops come in many colors, which you can sort for a mosaic. Our short history of beer bottle caps and why they still exist tells the rest of the story.
How to collect bottle caps (without drinking more)
The fastest way to fill a jar is to ask around, not to open more bottles. A few habits that work:
- Keep one container by the opener. A jar, a tin or a wall-mounted opener with a cap catcher (see our guide to the types of bottle openers) puts every cap in one place.
- Count every crown cap. Many sodas and alcohol-free beers in glass bottles use the same crown caps as beer, often in different colors.
- Ask friends and family to save theirs. One shoebox from a relative's garage fridge can beat months of your own collecting.
- Collect after a party. Caps end up on tables and under chairs; a bowl near the cooler saves you a sweep the next morning.
- Ask homebrewers. They may have unused caps left over from bottling.
If you're the host who opens bottles with a cap launcher, the cap collection comes built in. The Beer Mortar sits on the cap, takes one palm strike and sends the cap straight up, so every opened bottle ends with a cap to pick up and drop in the jar. Aim it straight up in a clear space, never toward people, pets, faces or anything breakable; our guide to what a beer mortar is and how to use it shows the motion, and the physics of a bottle cap trick shot explains where the cap lands.
Before you start: clean, flatten and finish
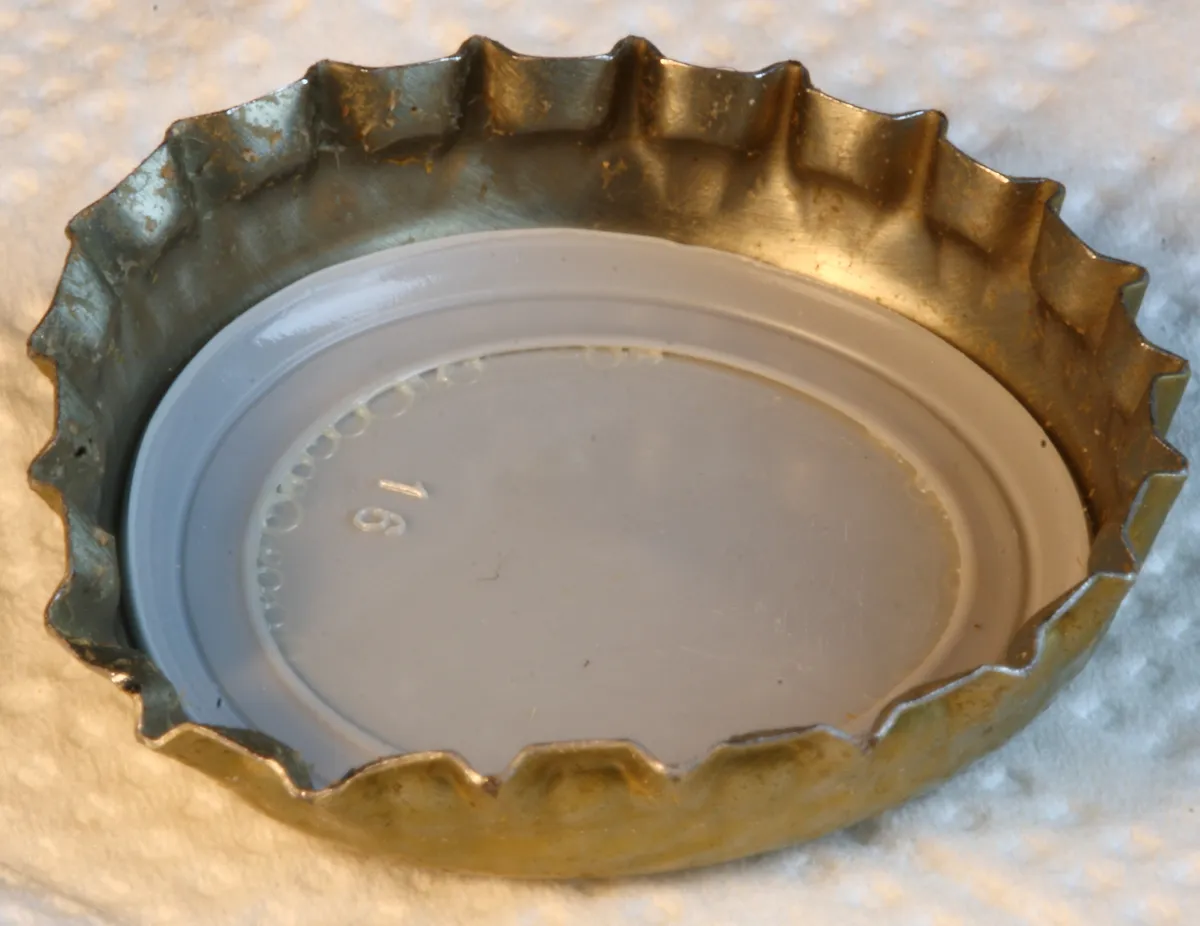
Photo: Hedwig Storch / Wikimedia Commons (CC BY-SA 3.0)
A used cap has a bent edge, a plastic liner and a bit of whatever was in the bottle. Three steps make it ready for crafts.
- Wash and dry. Soak the caps in warm soapy water, rinse and let them dry completely, face down on a towel and then face up. Steel caps can rust, and moisture trapped under glue or resin shows up later as rust stains.
- Decide: domed or flat. Most projects use caps as they are. For jewelry-style pieces or a flat mosaic, flatten them: cap face down on a hard surface, a scrap block of wood on top, a few taps with a hammer. Openers often bend one side of the cap, so sort out the worst ones first.
- Deal with the edge. The crimped edge is sharp, and flattening exposes more of it. Wear work gloves while you handle a batch, file or sand any edge people will touch, or hide it under a felt backing.
For glue, pick by project. A hot glue gun is quick for ornaments and push pins, but the glue is hot enough to burn and blister skin when it leaves the nozzle (Wikipedia, Hot-melt adhesive). A two-part epoxy or a strong clear craft adhesive suits anything that will be handled or hung.
10 bottle cap crafts for adults
1. Push pins for a cork board
Glue a cap to the flat head of a thumbtack and you have a push pin big enough to grab. Ten minutes, a handful of caps, and a good first project to test your glue.
Caps needed: a handful. Level: easy.
2. Fridge magnets
Glue a small magnet inside the cap, liner side, and let it set. Use magnets strong enough to hold a note but keep them out of reach of children: the US Consumer Product Safety Commission warns that when two or more magnets are swallowed they can attract each other inside the body, which often requires surgery (CPSC, Magnets). Glue them firmly, and skip this project in a house with toddlers.
Caps needed: one per magnet. Level: easy.
3. Coasters
There are two ways to make bottle cap coasters. The simple one: glue caps side by side on a cork or wooden coaster blank and glue felt underneath. The smooth one: set the caps in a silicone coaster mold and fill it with epoxy resin, so the glass sits on a flat surface instead of a bumpy one.
Caps needed: a handful per coaster, depending on its size. Level: easy (glued) to medium (resin).
4. Christmas ornaments
Bottle cap crafts for Christmas are mostly about ornaments. Glue two caps back to back with a loop of ribbon between them, or put a small photo or a painted scene inside the cap on the liner side. Painted white caps stacked three high make a snowman; a ring of green caps on a cardboard circle makes a small wreath.
Caps needed: one to three per ornament, a few dozen for a wreath. Level: easy.
5. A checkers or tic-tac-toe set
A checkers set needs 24 pieces, 12 per side: use caps of two colors, or the same caps with one set face up and the other face down. Draw or paint an 8 by 8 board on a piece of plywood and it becomes a game for the bar table, with no drinks involved. Tic-tac-toe needs only 10 caps and a scrap of wood.
Caps needed: 24 for checkers, 10 for tic-tac-toe. Level: easy.
6. A cap collection board or shadow box
If you want to keep every cap visible, a shadow box (a deep frame with a glass front) or a wooden board drilled with rows of shallow holes holds caps that press in and come out. Sort them by color, by country or by the year you saved them. A US or world map cut from plywood with a slot or hole for each place is a popular version of the same idea.
Caps needed: whatever you've collected. Level: medium (drilling needed for a board).
7. A mosaic for the wall
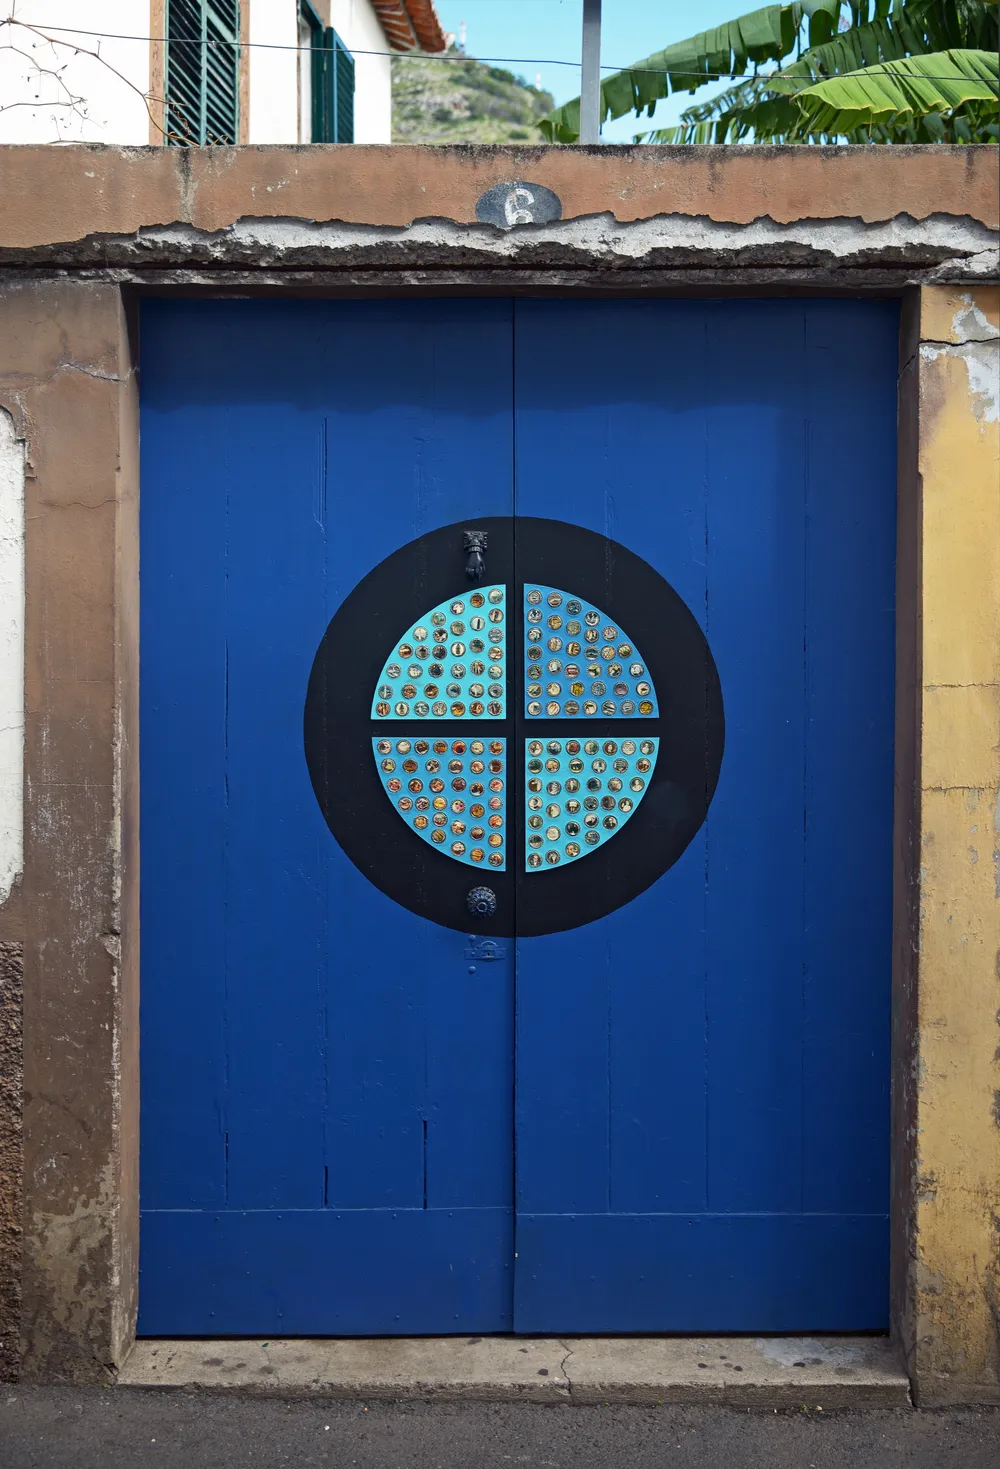
Photo: Ввласенко / Wikimedia Commons (CC BY-SA 3.0)
A bottle cap mosaic is the craft that shows off a big collection. Sketch the design on a board, sort the caps by color in trays, then glue or nail them in place row by row. The cover photo of this page shows a large wall mosaic made of plastic caps; the door above, in Machico on the island of Madeira, uses crown caps arranged in a simple circle, which is an easier first design. Start with a geometric pattern or a single letter before you try a portrait.
Caps needed: dozens to hundreds. Level: medium.
8. A framed mirror or picture frame
Glue caps all around a flat, wide wooden frame for a mirror over the home bar or a photo from the party where you collected them. Use a two-part epoxy or a strong construction adhesive for anything that hangs on a wall.
Caps needed: a few dozen, depending on the frame. Level: easy to medium.
9. A serving tray
Line the bottom of a wooden tray with caps and seal them under a layer of resin, so glasses and plates sit on a flat surface. It's a smaller-scale test of the technique before you try a full tabletop, and a good gift for someone who's setting up a home bar on a budget.
Caps needed: several dozen. Level: medium.
10. A resin bar top or table
The big project: a bar top or table covered in caps and sealed under clear epoxy resin. The method in short: lay the caps out dry first to plan the pattern and count them, glue them down so they don't move, pour a thin seal coat that fixes them and lets trapped air escape from under the domes, then pour the flood coat that gives the glass-smooth finish. Build a dam around the edges (tape or a wood strip) so the resin doesn't run off, and follow the resin manufacturer's limits on pour depth and curing.
Epoxy needs real precautions. Exposure to epoxy resin can cause contact dermatitis and allergic reactions, and breathing the vapors or the sanding dust can cause respiratory problems, especially before the resin is fully cured (Wikipedia, Epoxy). Wear nitrile gloves and safety glasses, work in a well-ventilated space, keep kids and pets out of the room, and wear a dust mask when you sand.
Caps needed: hundreds. Level: advanced.
Bottle cap crafts compared
| Project | Caps needed | Level | Main supplies |
|---|---|---|---|
| Push pins | A handful | Easy | Thumbtacks, glue |
| Fridge magnets | 1 per magnet | Easy | Small magnets, glue |
| Coasters | A handful each | Easy to medium | Cork blanks or silicone mold, glue or resin |
| Christmas ornaments | One to three each | Easy | Ribbon, paint, hot glue |
| Checkers / tic-tac-toe | 24 / 10 | Easy | Plywood, paint |
| Collection board or shadow box | Your whole collection | Medium | Board, drill or deep frame |
| Wall mosaic | Dozens to hundreds | Medium | Board, glue or nails |
| Mirror or picture frame | A few dozen | Easy to medium | Flat frame, strong adhesive |
| Serving tray | Several dozen | Medium | Wooden tray, resin |
| Bar top or table | Hundreds | Advanced | Epoxy resin, gloves, ventilation |
What to do with the caps you don't use
Metal caps can go in the recycling, but how depends on where you live. Loose caps are small enough to slip through sorting machines. The Rhode Island Resource Recovery Corporation, for example, asks residents to fill an empty steel can about a third to half full with caps and pinch the can shut with pliers so they make it through the facility (RIRRC, Metal bottle caps); other programs take caps loose. A fridge magnet tells you which caps are steel. Check your local program, or start from the EPA's recycling basics.
A note on caps and drinking
Bottle caps make a good craft supply because they pile up over time, not because anyone should speed up the pile. Caps from soda and alcohol-free beer count, and a project that takes a year to collect for is still a good project. Drinks containing alcohol are for adults who are 21 or older in the US (23 U.S.C. 158) or 18 or older in the UK (GOV.UK). For tips on keeping drinking moderate, see NIAAA's Rethinking Drinking or the UK charity Drinkaware.
The bottom line
The best bottle cap crafts for adults match the size of your collection: push pins, magnets and ornaments for a handful of caps, coasters, checkers and frames for a few dozen, and a mosaic, a tray or a resin bar top once the jar is full. Wash and dry the caps, mind the sharp edge, take epoxy and magnets seriously, and recycle what's left in a sealed steel can if your program asks for it. To keep the caps coming, put a jar next to your opener; if that opener is a Beer Mortar or a CapBlast keychain lever, both are in our shop, with free shipping.